

How to Build a DIY Outdoor Bar (Or Skip the Hassle Entirely)
You've got the backyard. You've got the vision: weekend cookouts, game days, cold drinks with friends. What you don't have yet is a plan for turning that empty patio corner into reality. This guide walks you through building a diy outdoor bar from the ground up, covering layout, materials, budget, and financing options, so you can start entertaining with confidence instead of guesswork.
Before You Start: What You Need to Plan a DIY Outdoor Bar
Space and Site Requirements
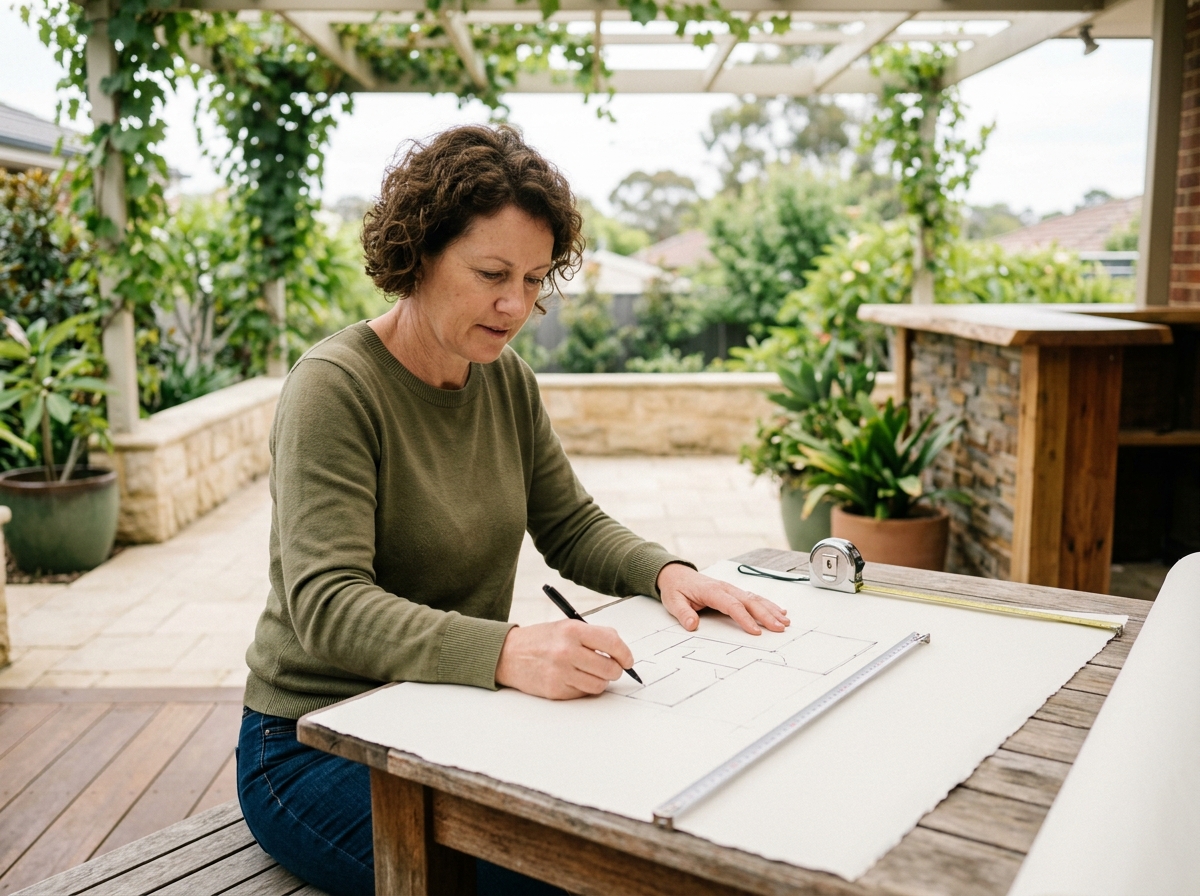
Start by walking your yard with a tape measure, not just your imagination. Look at how much flat space you actually have. Be honest about it. A level surface matters more than people think — pavers, concrete, and packed gravel all work, but soft grass or sloped dirt will cause headaches later. If you're low on ideas for laying out the rest of the yard around it, browsing practical ways to enhance your outdoor space before labor day can help you see how a bar fits into the bigger picture.
Proximity matters too. Placing the bar too far from your grill or seating area kills the flow of a party fast. Aim for a setup where the bartender can hand off a drink or a burger without a hike. Most homeowners find 6 to 10 feet of open clearance around the structure works well for foot traffic, chairs, and a cooler or two.
Budget and Permit Basics
Set a real number before you fall in love with a design. Basic prefab kits often start around $2,000 to $4,000, while larger custom builds with roofing, electrical, and finish work can run well past $10,000. Building from scratch gives you full control but eats weekends; a kit trades some customization for speed and consistency. Either way, decide early. It shapes every choice after this.
Before you order lumber or a kit, call your local zoning office. Many towns treat anything with a roof and posts as a permanent structure, which can trigger permit rules tied to size, height, or setback distance from property lines. HOAs add another layer, sometimes restricting materials, color, or placement. It's a boring step. Skip it and you might be tearing down your new bar next spring.
Once the legal side is clear, nail down your measurements: width, depth, height, and entry-side clearance for whoever's pouring the drinks. Many builders sketch this out before buying a single board, and it's worth reading a real-world patio bar build thread to see how others handled awkward corners and tight yards.
Step 1: Choose the Right Outdoor Bar Style for Your Space
Matching Style to Yard Size
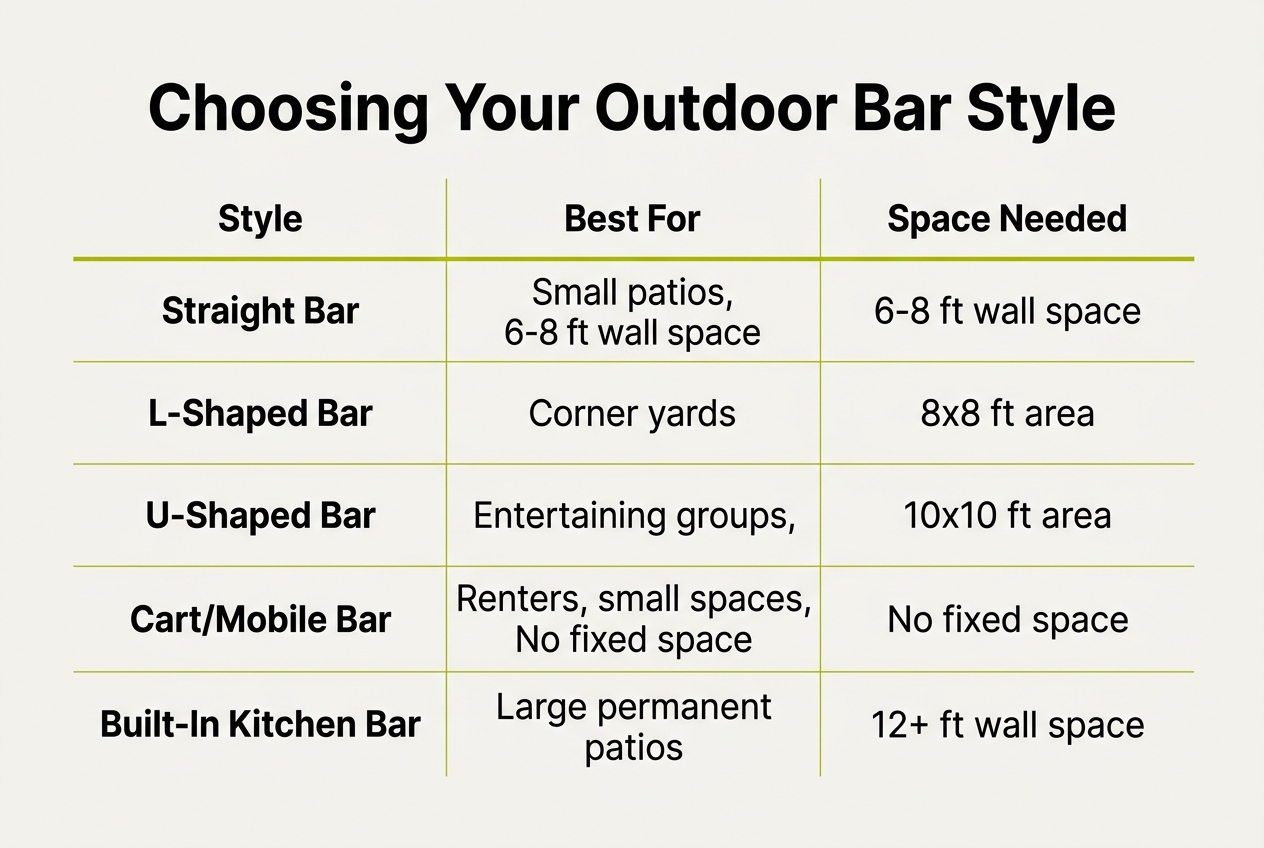
Before you fall in love with a design, walk your yard and measure the actual footprint you have to work with. A tiny patio and a quarter-acre lot call for very different bars, and guessing on this step is how people end up with something too bulky for the space. A standup bar works well in small spaces since it takes up minimal floor area and keeps foot traffic moving during a party. Got more room? A high sit-down bar built for stools gives friends a place to camp out during the game. Planning early also matters if you're timing the build around a holiday, and it's worth reading up on how to host a fun Memorial Day party with a custom backyard bar so you know what a finished layout needs to support real entertaining.
Covered vs Open-Air Layouts
Once size is settled, the next decision is shape and coverage. This is where most of the practical trade-offs live.
- A low sit-down or split-level bar works double duty as a dining spot by day and a drink station by night, which suits families who want one structure to do more.
- A single-sided layout backs up against a fence or wall and saves space, while a double-sided or corner bar lets guests gather from multiple angles at once.
- A covered or roofed bar keeps the structure weatherproof and usable through rain, snow, and blazing sun alike, stretching your entertaining season into months you'd otherwise lose.
- Open-air designs feel airier and cost less to build, but they leave your bottles and electronics exposed unless you plan storage carefully.
An open frame looks great on a sunny afternoon, then feels pretty regrettable in a downpour. For smaller weekend projects, it also helps to see how to build a quick DIY outdoor bar laid out step by step, since scaling those same principles up or down is easier once you've seen the basics in action.
Step 2: Pick Materials That Hold Up Outdoors
Wood, weather, and time are always fighting each other. Pick the wrong material and you're re-staining or replacing boards within a couple of seasons. Anyone researching how to build an outdoor bar that actually survives rain, sun, and salt air should start with framing, since that's the skeleton everything else hangs on.
Framing Material Comparison
Pressure-treated lumber is the budget workhorse. Cedar smells nice and resists rot naturally, but it costs more and needs more upkeep. Composite framing barely needs maintenance, though it's pricier and less common for full structural posts. Here's how they stack up:
| Material | Lifespan (outdoors) | Maintenance | Relative Cost |
|---|---|---|---|
| Pressure-treated lumber | 15–25 years | Reseal every 2–3 years | $ |
| Cedar | 15–20 years | Occasional oil/stain | $$ |
| Composite framing | 25+ years | Minimal, occasional wash | $$$ |
| Untreated pine | 5–8 years | Frequent sealing | $ |
Roofing and Countertop Options
Galvanized corrugated steel sheds rain fast and shrugs off hail; asphalt shingles look traditional but trap moisture and invite rot underneath. For countertops, butcher block feels warm but needs regular oiling; tile is durable but grout stains; concrete is nearly bulletproof yet heavy and pricier; laminate is cheap but hates direct sun. Whatever you choose, matching material grade to your climate matters more than style alone. If you're in a windy or snow-heavy region, upgrading to 6x6 post framing with wider roof supports adds real stability. It's not overkill, it's just smart insurance.
Step 3: Build or Order the Structure
Framing and Anchoring Basics
Once your materials are staged, the actual build follows a fixed order. Set your posts first, plumb and braced, then build the base frame that carries the bar top's weight. From there you add the bar top itself, followed by the roof trusses. Skip a step or rush the bracing and the whole thing racks sideways in the first strong gust. If you want a jolt of visual motivation before you pick up a drill, browsing backyard bar layouts and fence-bar setups can help you settle on proportions before the lumber gets cut.
Anchoring matters more than most people think. In exposed yards or high-wind regions, expansion bolts driven into a concrete pad or footing keep posts from lifting or shifting over time. Skipping this step is the number one cause of wobble complaints down the line.
Prefab vs Fully DIY Timelines
Not everyone has a free weekend, a truck, and a table saw. Factory-built kits, delivered flat-packed or panelized and assembled on-site by a crew, compress the timeline dramatically. Here's how the two paths stack up in practice.
| Approach | Typical Timeline | Tools Needed | Best For |
|---|---|---|---|
| Fully DIY build | 1–3 weekends | Circular saw, drill, level, post hole digger | Hands-on homeowners with time to spare |
| Prefab kit, DIY assembly | 4–8 hours | Drill, ratchet set, basic hand tools | Moderate DIYers wanting shortcuts |
| Factory-built, on-site assembly | About 90 minutes | None, crew brings everything | Busy schedules, tight deadlines, game day prep |
| Custom shed/bar combo build | 2–4 weekends | Full framing toolkit | Larger builds needing storage plus bar space |
A prefab option wins when your weekends are already spoken for, or when you simply don't trust your own framing squares yet. It also wins if you're building ahead of a specific event, like a Super Bowl party three weeks out. Many local businesses and dedicated providers now offer this route with the same pressure-treated lumber and steel roofing you'd source yourself, just assembled faster and with fewer trips to the hardware store.
Step 4: Adapt the Design for TVs, Grills, and Tight Spaces
Fitting a TV and Entertainment Setup
Game day is nothing without a screen, and that's where roofline flexibility earns its keep. Most backyard bar frames can be built with an adjustable header height, giving you the extra clearance a 55-inch or 65-inch TV needs above the bar top. A few extra inches at the roofline means no cricked necks watching the fourth quarter. Get the measurement wrong and you'll be staring at the bottom third of the screen all season. Worth double-checking before any post goes in the ground.
Mounting matters just as much as height. A shelf or crossbeam built specifically for a TV mount keeps cables hidden and the unit protected from rain angle, not just roof coverage. Some owners frame in a shallow alcove above the bar back, recessing the screen slightly so it's shaded during afternoon glare. If you're leaning toward a fuller setup, one useful reference is a build that walks through a built in cooler outdoor bar project, which shows how entertainment and storage zones can share the same footprint without crowding either one.
Low headroom yards, think pergolas, low eaves, or overhanging trees, don't have to rule out a TV setup. Removable roof panels let you drop the roofline for tight clearance, then pop panels off temporarily for taller installs or maintenance. It's a small design choice that saves a lot of regret later.
Solving Storage and Space Constraints
A bar without storage turns into a cluttered countertop fast. Grilling stations built into or alongside the structure solve two problems at once: they free up bar top space and keep propane tanks, tools, and utensils within arm's reach. Shed/bar combos take this further, pairing a full bar with an attached storage shed for cushions, games, or seasonal decor. It's basically a garage for your fun stuff.
Narrow yards and corner lots present their own puzzle, and this is where a customizable entry side matters most. Instead of a fixed layout, the entry point can be shifted to whichever side keeps foot traffic clear of fences, AC units, or property lines. A bar with the entry on the wrong side is just a wall with a roof — nobody can get behind it to pour a drink. Measuring your usable width before choosing entry placement avoids a costly redo.
Corner lots often benefit from an angled placement rather than a straight run along the fence line, which opens sightlines to both the grill and the yard. Combined with adjustable roof depth, even a modest 10-by-10 footprint can house a functional bar, grill zone, and walk-through path without feeling cramped.
Step 5: Weatherproof, Personalize, and Accessorize
Seasonal Protection
Your structure is up. Now protect it, because a beautiful bar that rots by spring isn't much of a win. Weatherproofing starts with panels that close off open sides against snow load and freezing wind. Winter kits typically snap or bolt into the existing frame, sealing gaps where drifting snow and ice would otherwise collect on shelving and electronics.
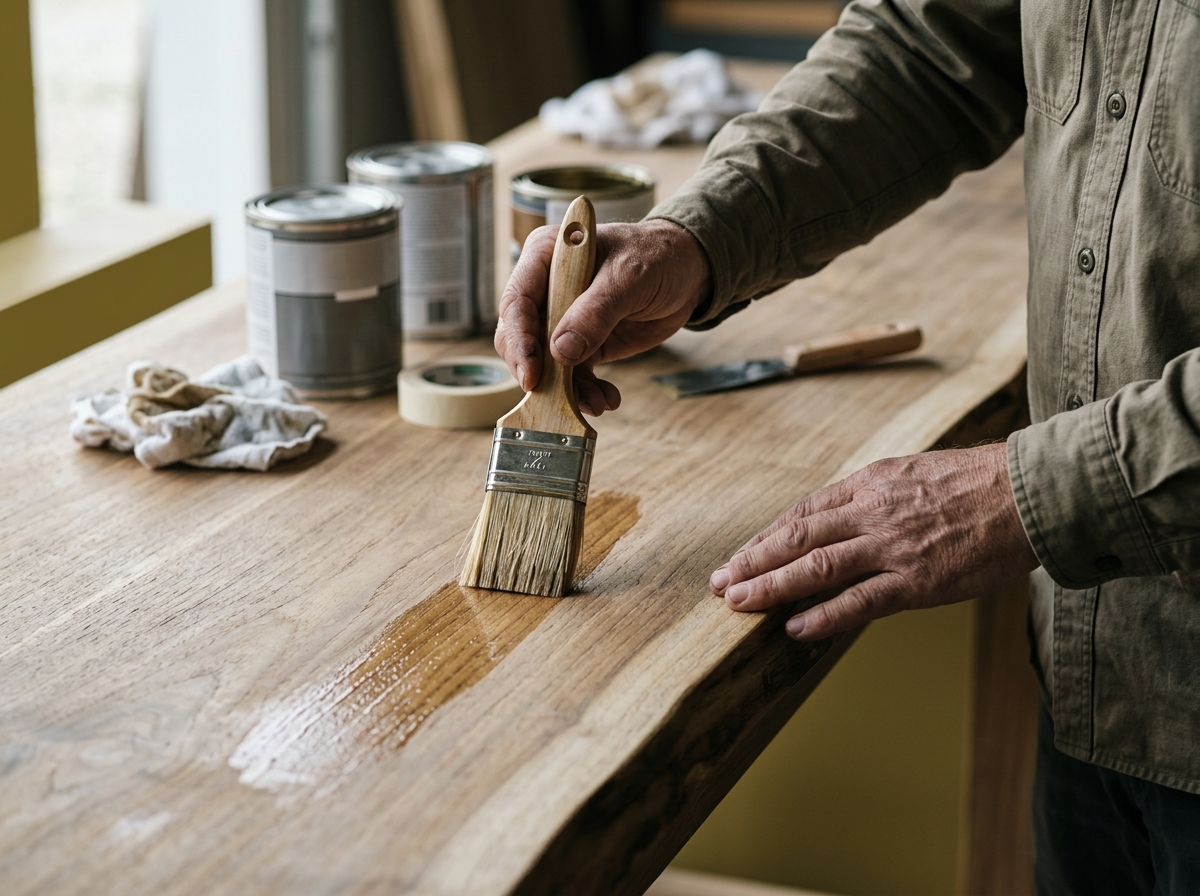
Beyond panels, moisture control matters everywhere wood meets weather. A quality exterior sealant or stain with UV inhibitors will slow graying and cracking on posts and trim. For browsing broader layout and finish inspiration before you commit to a look, some homeowners review Modern Outdoor Bar Ideas to see how composite and wood finishes hold up side by side over several seasons.
Finishing Touches and Accessories
Once the structure's protected, it's time for the fun part: making it yours and stocking it. Whether you go with a full paint package or DIY the color yourself, a few essentials turn a bare frame into a working bar.
- Choose an exterior-grade paint or stain in a color that matches your house trim or fence, since consistency reads as intentional rather than accidental.
- Treat the countertop separately with a marine-grade polyurethane or butcher-block oil rated for standing water, since spilled drinks and ice melt do real damage over time.
- Install a small bar fridge or cooler sized for the footprint, so drinks stay cold without crowding the pour space.
- Add a slide-out or wall-mounted shelf system for glassware, bottles, and bar tools, keeping the counter clear during service.
- Run low-voltage LED strip lighting under the roofline or shelves, which adds ambiance and makes night pours easier to see.
- Consider a basic tap tower or drink dispenser if you're serving beer or cocktails on tap, since it saves constant trips inside.
None of this needs to happen at once. Add pieces as budget allows, and the bar keeps improving season after season.
Step 6: Compare Costs and Financing Options for Your DIY Outdoor Bar
Estimating Your Total Budget
Money talks, so let's get specific. A scratch build from raw lumber, hardware, and roofing typically runs $1,500 to $4,000 once you count tools you may not already own, like a miter saw, post-hole digger, and a decent level. Prefab kits skip most of that labor and material guesswork, and they scale by size, small footprints for a couple of stools, x-large ones built for a crowd. Before you commit to a design, working through a DIY Outdoor Bar Plan can help you sanity-check dimensions and lumber counts against your actual budget.
| Build Option | Approx. Cost Range | Best For |
|---|---|---|
| Scratch build (small) | $1,500–$2,200 | Handy owners with tools already on hand |
| Prefab kit, small | $3,000–$4,500 | Tight patios, small gatherings |
| Prefab kit, medium/large | $5,000–$8,500 | Regular entertaining, game days |
| Prefab kit, x-large + deluxe framing | $8,500–$13,000+ | Big backyards, full outdoor kitchens |
| Add-ons (grill combo, shed pairing, paint package) | $300–$2,000 each | Personalizing an existing structure |
Deluxe upgrades, like beefier 6x6 posts, cost more but pay off in wind resistance and lifespan. That's not a small thing if you're near open ground. Financing plans, often structured as monthly payments over 12 to 36 months, let many local businesses' customers spread that cost out instead of paying it all upfront. Worth considering if the x-large model is calling your name but your savings account says otherwise.
Final Walkthrough: Bringing Your Backyard Bar to Life
Quick Recap Checklist
By now you've moved through planning, materials, structure, and the finishing touches. Layout first, then lumber, then the build itself, then TVs and grills, then paint and accessories, then the money math. That's the whole arc. It helps to see it laid out in order, because skipping steps is exactly how backyard builds stall out for months. Before your first pour or purchase, some homeowners like to watch a budget-focused outdoor bar build just to see how someone else sequenced their decisions and where they saved money.
DIY makes sense if you're comfortable with a circular saw, have a free weekend, and want a smaller structure like a simple counter or serving station. Call in professionals once you're dealing with heavy roofing, electrical runs for lighting or a mini-fridge, or a large footprint that needs proper anchoring. It's not a failure to hire out. It's just math. Your time has value too.
For your first game day, stock ice early, keep the menu simple, and set up seating so nobody's back is to the TV. Test the grill and any lighting a day ahead, not an hour before kickoff. Small dry runs save real embarrassment.
Before you commit to a plan, it's worth being honest about which parts of the project you actually want to own: the slab or paver base needs to be level and set before anything goes on top of it, and a hardscaping contractor is the right person to get that right the first time. Ask what your surface will need to handle drainage, settling, and the weight of whatever you're placing there, and get clear on timing so the groundwork has cured and settled before anything else arrives. The more you know about what's under your feet, the easier every decision after it becomes.