

Cheap DIY Outdoor Bar Ideas That Still Look High-End
You've typed "cheap diy outdoor bar" into a search bar a dozen times, and you're still staring at a pile of pallet wood in your garage wondering if this is really worth the weekend. It rarely is. Between lumber costs, tool rentals, and the three trips back to the hardware store, that "budget" build starts eating into money and time you don't have. Below, we'll walk through nine legit low-cost builds. Then we'll show you why a prefab kit usually gets you drinking sooner, for less hassle, and often for less cash.
1. Weigh DIY vs Prefab Before You Buy Lumber
Before you drive one screw, get honest about what a weekend build actually costs. Not just in dollars. In trips to the hardware store and Saturdays you won't get back. Plenty of builders promise a $200 bar, and one popular guide to building a budget bar for around $200 shows it's possible with salvaged wood and a lot of elbow grease. But that number rarely includes everything you'll end up buying halfway through.
True Cost Breakdown of a Weekend Build
Here's where the money actually goes on a typical 6-foot outdoor bar project, based on common lumber and hardware pricing:
| Cost Item | Estimated Range | Often Forgotten? |
|---|---|---|
| Pressure-treated lumber | $150–$350 | No |
| Exterior screws, brackets, anchors | $30–$70 | Yes |
| Roofing or corrugated steel panels | $80–$200 | Yes |
| Stain, sealant, weatherproofing | $40–$90 | Yes |
| Tool rental (saw, drill, level) | $50–$120 | Yes |
Where Prefab Kits Save Time and Money
Add it up and a "$200 bar" often lands closer to $500–$700 once fasteners, sealant, and wasted cuts get counted. That's before permits, which some towns require for anything with a roof. Factory-built bars skip most of this entirely, arriving pre-cut and assembled on-site in about 90 minutes. Reading a straightforward comparison of diy backyard bar vs prefab kit costs helps clarify which route actually fits your budget and timeline. DIY makes sense if you enjoy the process and already own tools. If your weekends are precious, a kit usually wins on total cost once labor and mistakes get factored in.
2. Pallet Bar: The Classic Zero-Cost Build
Sourcing and Prepping Pallets
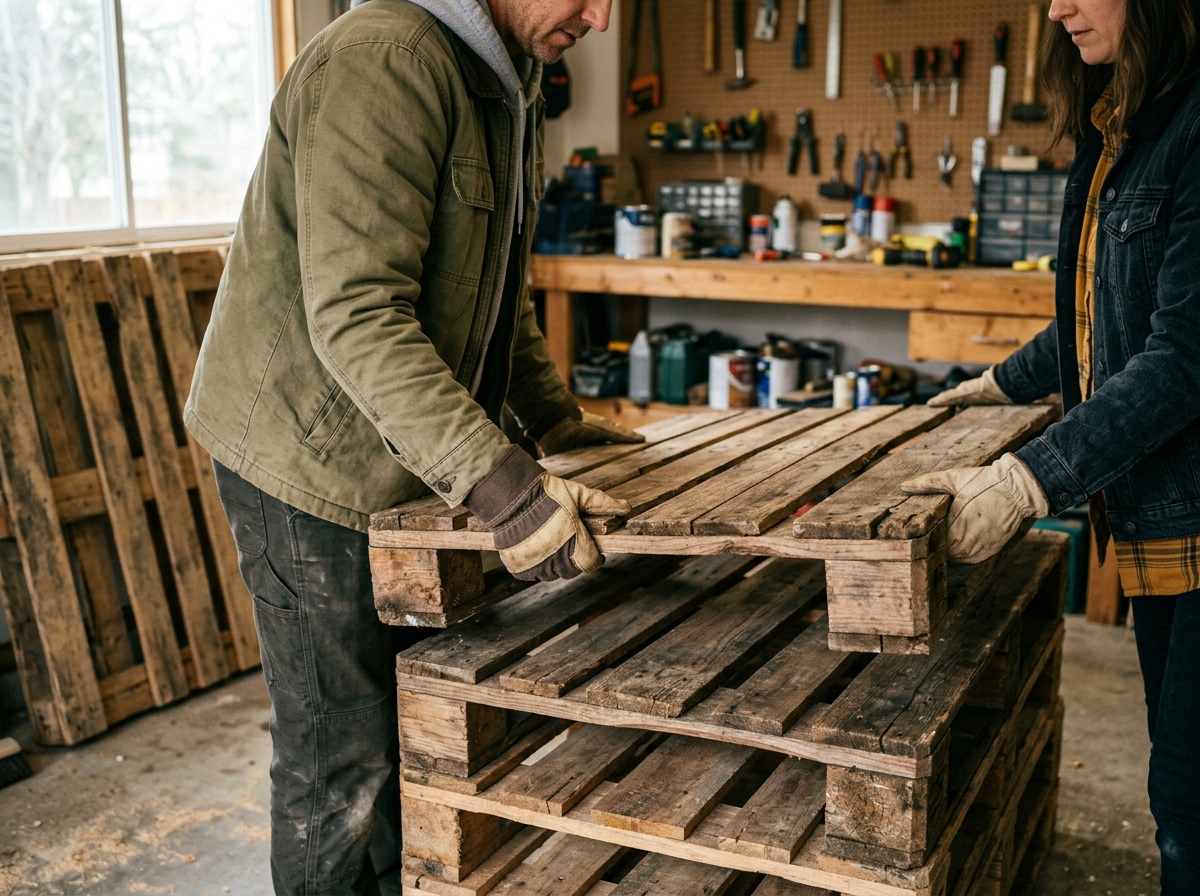
Free pallets are everywhere once you start looking. Check behind hardware stores, garden centers, and warehouse retailers. Most will let you haul away what's stacked near the dumpster if you just ask. Look for pallets stamped "HT" (heat-treated) rather than "MB" (methyl bromide fumigated). The former is safe for outdoor furniture. The latter isn't something you want near drinks. You'll typically need six to ten pallets for a modest bar, and it costs nothing but gas and a little charm at the loading dock.
Once home, pressure wash each pallet and let it dry fully for a day or two. Sand down rough edges and splintered boards with an orbital sander — 80-grit first, then 120 for a smoother finish. Seal everything with an exterior polyurethane or deck stain rated for weather exposure; two coats minimum. This step matters more than people think, since untreated pallet wood soaks up rain and starts rotting within a season. It's worth reviewing typical outdoor bar cost breakdowns before deciding how much time and material to sink into a free-pallet build.
Reinforce the frame before you stack anything. Add internal 2x4 bracing at the corners and screw pallets together rather than relying on nails alone; deck screws hold far better under repeated stress. A single pallet layer isn't rigid enough for a countertop, so double up the top section or cap it with a piece of plywood for a flat, stable surface.
Be honest about what this build can and can't do. Pallet wood is soft, thin, and never kiln-dried to furniture standards, so it warps, splits, and attracts pests faster than dimensional lumber. Expect a lifespan of two to three years outdoors, even with good sealing. Don't lean on it, either — most pallet bars max out around 150 to 200 pounds of static weight before joints start stressing. It's a fine weekend project. Just don't expect it to outlast your mortgage.
3. Cinder Block and Wood Plank Bar
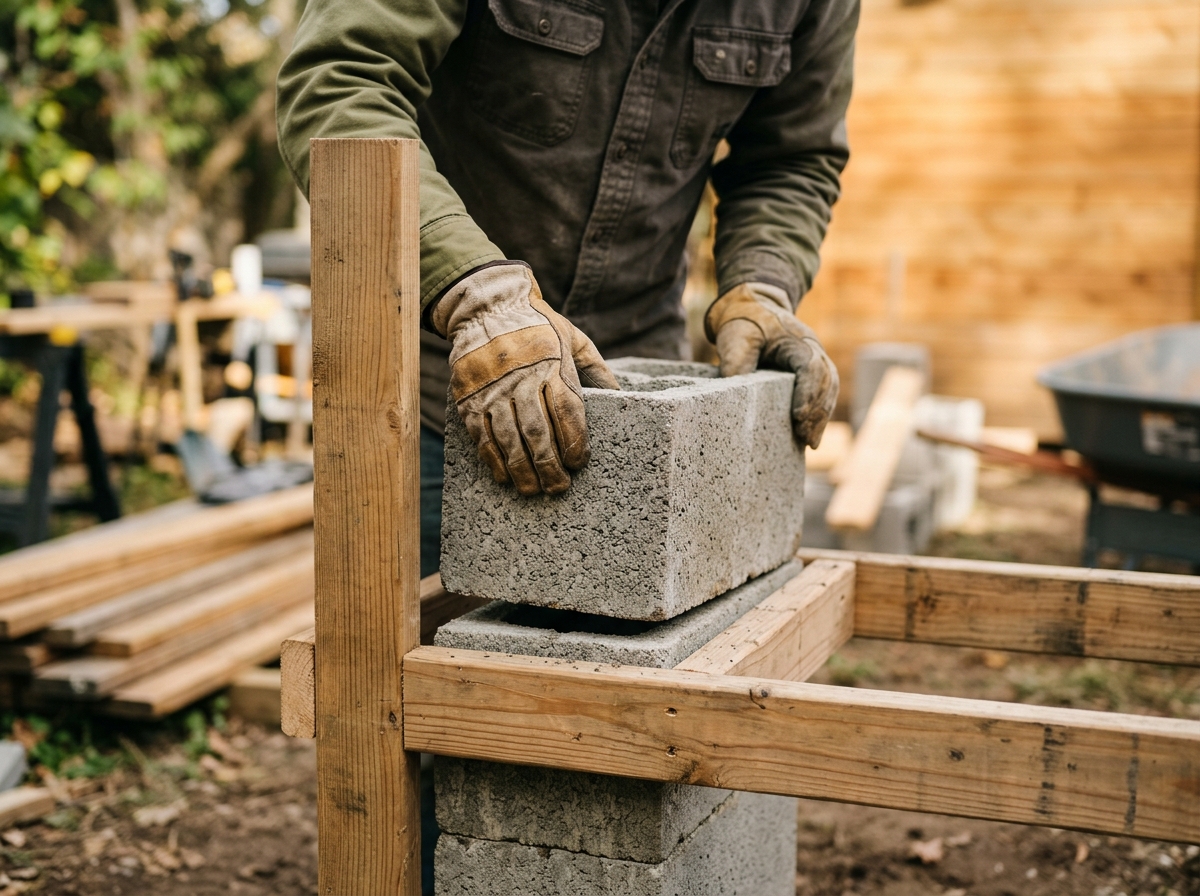
This one's about as simple as it gets. Stack standard 8x8x16 cinder blocks into two or three columns, no mortar, no tools, no skills required. Lay a thick wood plank or a piece of butcher block across the top for your countertop, and you've got a functioning bar in under an hour. Want more storage? Leave gaps in the block pattern for wine bottles or glassware. It's the kind of project you can knock out on a Saturday morning before anyone's even had coffee. If you're still hunting for layout inspiration before you commit to blocks and lumber, browsing a few outdoor bar ideas can help you figure out sizing and counter height that actually suits how you entertain.
This build is best for renters or temporary setups since nothing's permanent and it disassembles just as fast as it went up. No screws, no anchors, no landlord disputes.
Uneven ground is the real enemy here, though. Cinder blocks stacked on a slope or soft soil can shift, wobble, or worse, topple with a full drink tray on top. Check your yard's grade first, and use pavers or a compacted gravel base underneath each stack for a level, stable foundation. Skip that step and you'll be re-stacking blocks every few weeks.
4. Repurposed Furniture and Dresser Bars
Got an old dresser gathering dust in the garage? That's your bar. Pull the bottom drawers, add a shelf for bottles, and keep one drawer intact for napkins and bottle openers. A busted cabinet from a curb find works just as well. Upcycling costs almost nothing beyond some hardware and a free Saturday. If you want a visual walkthrough before you start swinging a crowbar, this step-by-step backyard bar build shows how the framing and finishing come together on a similar small-scale project.
Wheels change everything. Four locking casters, rated for at least 50 pounds each, turn a static cabinet into a rolling cart you can tuck into a shed when rain hits. It's a small upgrade with a big payoff.
Weatherproofing matters more than people think. Skip regular latex paint. Use exterior-grade acrylic paint, then seal with a marine-grade polyurethane or spar varnish, both built to handle sun and moisture without peeling. Two coats, light sanding between them, done. This approach shines for small patios, condos, and apartment balconies where a full-size structure just won't fit. Compact and mobile beats big and stuck every time in tight outdoor spaces.
5. Simple 2x4 Frame Bar You Can Build in a Weekend
This build is basic stud-frame carpentry, nothing fancy. If you can measure, cut, and drive a screw straight, you can knock this out over a Saturday and Sunday. It won't have a roof or fancy joinery, but it'll hold drinks, look sharp with a coat of stain, and cost less than a night out for four.
Materials and Tools Checklist
Before you start, gather everything below so you're not making three hardware store runs mid-project. Quantities assume a 6-foot bar, 42 inches tall, which fits most backyard layouts comfortably.
| Item | Quantity | Approx. Cost | Purpose |
|---|---|---|---|
| 2x4 pressure-treated studs | 12–14 | $65–$85 | Frame, legs, footrest support |
| 3/4-inch plywood | 1 sheet | $45–$60 | Countertop base |
| Shiplap or cedar cladding | 1 bundle | $70–$100 | Front and side paneling |
| Deck screws (3-inch) | 1 box | $12–$15 | Framing connections |
| Circular saw, drill, level | 1 each | Owned or $50 rental | Cutting and assembly |
Step-by-Step Build Order
Start with two ladder-style frames for the end walls, then join them with horizontal 2x4s to form the box. Square everything with a level before you drive a single screw. Once the skeleton's solid, cap it with plywood, then wrap the front in cladding. Anyone who's browsed a build guide for an outdoor bar with a built-in cooler knows leaving a gap for ice storage early saves you from cutting into finished panels later. Add a mid-height ledge for a footrest using scrap 2x4, then trim the countertop overhang for knee room. Budget $250 to $300 total and two full days, including drying time for stain.
6. Cheap diy outdoor bar Upgrades That Add Big Value
Low-Cost Add-Ons Worth the Investment
A basic bar frame is just the starting point. The upgrades are where a backyard bar actually starts feeling like your space instead of a leftover construction project. Most of these cost far less than the build itself, and they solve real problems: weather, storage, comfort, and looks. If you're still nailing down the basic structure, it helps to first learn how to build a quick DIY outdoor bar before layering on extras, since the frame dictates what upgrades will actually fit.
Here's where your money and time are best spent once the frame is up:
- Paint or stain packages that protect wood from sun and moisture while giving the bar a finished, personalized look instead of raw lumber gray.
- Winterize panels or removable side walls that shield the structure from snow load, ice, and wind damage in colder regions.
- A compact grill station or griddle mount that turns the bar into an actual cooking hub, not just a place to set drinks.
- Bartender essentials like a bottle opener rail, drainage mat, and small fridge that make the space function like a real bar, not a shelf with a roof.
- Adjustable roof height or a removable panel that makes room for a mounted TV or accommodates lower headroom in tight yards.
None of these require carpentry skill. Most are weekend afternoon jobs. Skip them, though, and you'll notice the gaps fast — usually the first cold snap or the first game day crowd.
7. Shed and Bar Combos for Extra Storage
If your yard is small, dedicating space to a bar that does nothing else feels wasteful. A shed and bar combo fixes that. One side holds a work bench, mower, pool floats, and off-season cushions. The other side opens up for stools and a countertop. Same footprint, double the function. That's the whole appeal, really.
This setup works especially well for anyone who's outgrown a plastic storage bin situation but doesn't have room for a shed and a separate bar structure. Browsing a few outdoor bars ideas boards will show you how often storage gets tucked behind or beneath the bar itself, rather than treated as an afterthought. Rubbermaid-style resin sheds are cheap but flimsy; a combo built from real lumber holds up longer and looks like it belongs in the yard, not next to the trash cans.
For layout, keep the storage door on the side facing the fence or house, and orient the bar opening toward your patio or lawn. That way traffic flows naturally toward seating, not toward the mower.
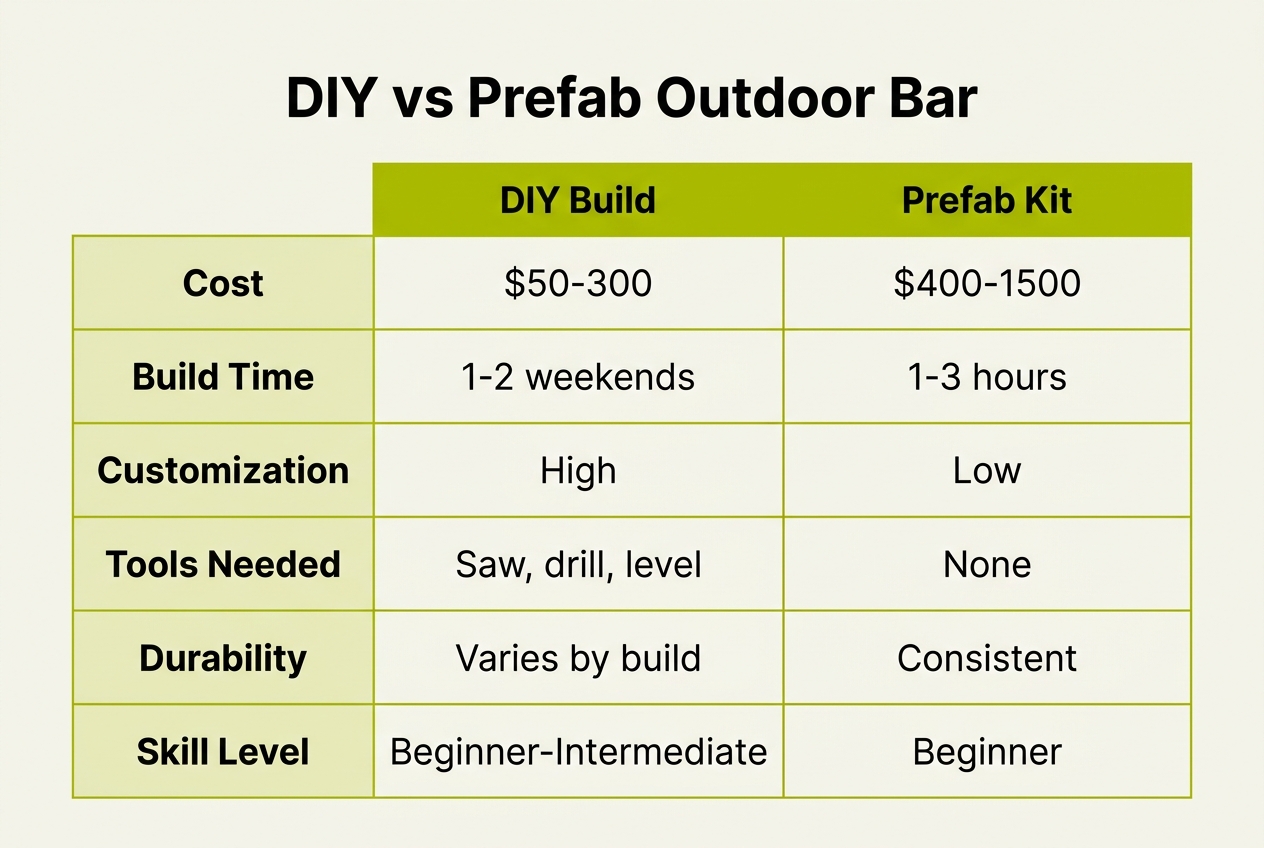
8. DIY vs Prefab Kit: Pros and Cons at a Glance
By now you've read through the build options above, so let's put the two paths side by side. The real trade-off isn't money vs. no money — it's time and risk vs. speed and certainty. A weekend build can cost less upfront, but you're the general contractor, inspector, and warranty department all at once.
| Factor | DIY Build | Prefab Kit |
|---|---|---|
| Upfront material cost | Lower, often scrap or reclaimed wood | Higher sticker price, all materials included |
| Time to finished bar | One to several weekends | About 90 minutes on-site assembly |
| Skill and tools needed | Saw, level, framing know-how required | None — arrives built by pros |
| Weatherproofing | Inconsistent, depends on your sealing job | Grade #1 pressure-treated lumber, galvanized steel roofing |
| Warranty / guarantee | None | Refund guarantee, financing options available |
Notice the pattern: DIY wins on flexibility and initial spend, prefab wins on everything that happens after you've paid. If you want a structured starting point rather than freeform trial and error, a DIY Outdoor Bar Plan is worth studying for lumber sizing and layout before you cut a single board. Either way, be honest about what your Saturdays are actually worth. Some folks love the sawdust. Others just want a cold drink and a working bar by Friday.
9. When to Call in the Professionals
Even the handiest homeowner hits a wall eventually. Maybe the lumber bill keeps creeping up, or the weekend project has stretched into month two. That's your cue to stop and reassess before you sink more time and money into something that still might not hold up.
Signs You Should Skip the DIY Route
Some warning signs are obvious. Others sneak up on you after the third trip to the hardware store. Watch for these:
- Your materials budget has already blown past what a factory-built option would cost, and you're not even done framing yet.
- You're improvising on footings or anchoring because you're not sure how to secure the structure against wind in an open backyard.
- The roofline, height, or TV placement keeps changing because you didn't plan the layout before cutting lumber.
- You lack the tools or a second set of hands needed to safely square up heavy posts and beams.
- The project has stalled for weeks, and half-finished framing is now a tripping hazard and an eyesore.
If two or more of these sound familiar, it's worth pricing out a professional alternative before you buy another board.
How a Professional Build Compares
Exposed, windy lots need real anchoring, not guesswork. Established builders handle this with expansion bolts and engineered footings, the same logic you'll see if you go looking for an affordable multi-purpose outdoor bar build for reference. Many local businesses now deliver nationwide and assemble on-site in about 90 minutes, a stark contrast to a DIY timeline measured in weekends. Credibility matters too: a builder with a national TV feature, national newspaper coverage, thousands of completed builds, and a near-perfect customer rating has earned some trust. Financing options can also make a custom build more affordable than expected, often rivaling what you'd spend building it yourself.
Before you commit to a plan, it's worth sitting with a few honest questions: how much of this project do you actually want to build yourself, and how much do you want simply handled? A set of plans rewards the person who genuinely enjoys the sawdust and the weekends, while a finished structure delivered and assembled for you rewards the person whose real goal was the first drink poured, not the framing. Weigh your tools, your timeline, your level surface, and whether the satisfaction you're after comes from the building or the using — that answer usually points clearly in one direction.