

DIY Patio Bar Plans: What to Know Before You Start Building
Your backyard has potential, but right now it's just a patchy lawn and an underused patio. You want a real gathering spot—something like the backyard tavern setups you saw blow up on Shark Tank—without blowing your entire budget or summer. This guide walks you through building a diy patio bar that handles game days, weekend cookouts, and everything in between. Whether you're financing the full build or tackling it in stages, we'll show you exactly how to get there.
Before You Start: Planning Essentials for Your Backyard Bar Project
Tools and Materials You'll Need
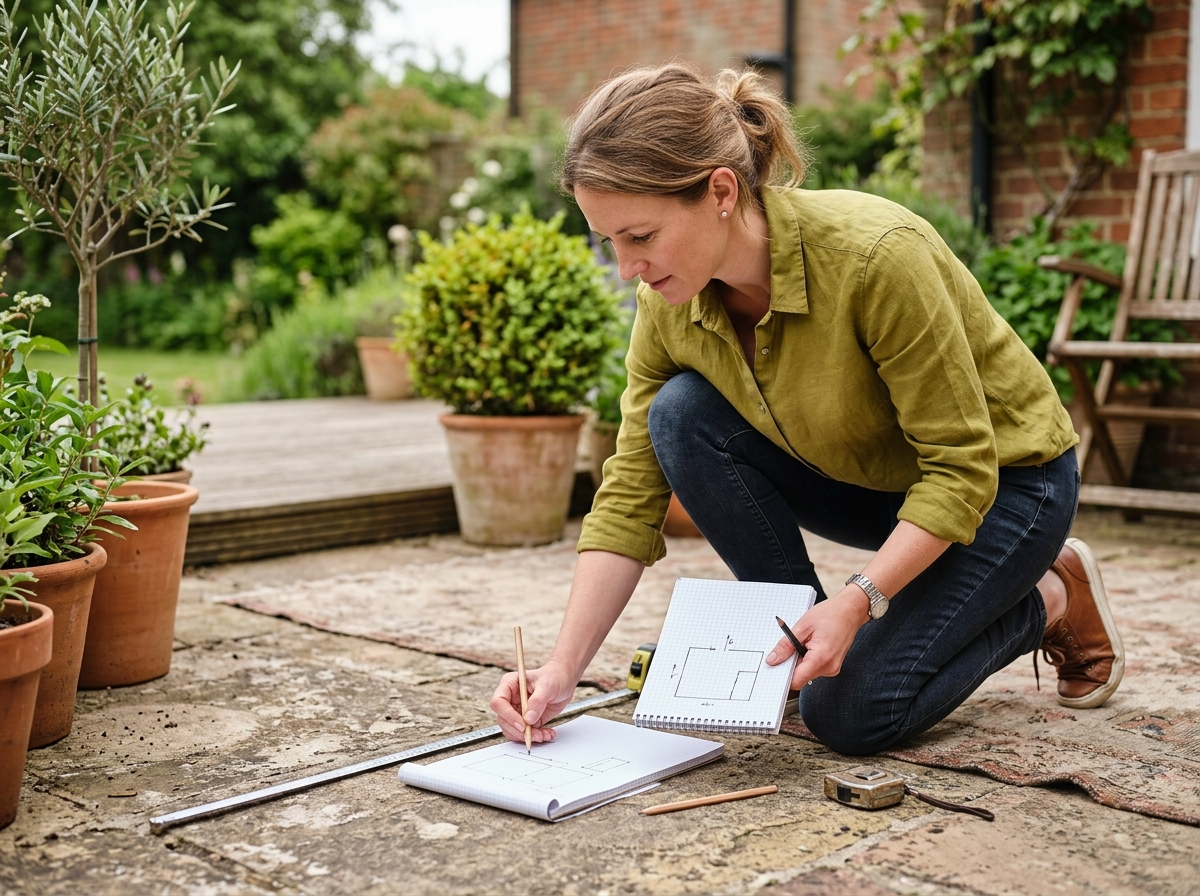
Start with your patio itself, not a shopping list. Walk the space. Think about traffic flow: where people enter, where the grill lives, where the cooler chairs will end up. A bar jammed against a walkway becomes a bottleneck fast. Measure twice, then measure again before you commit to a footprint, because layout mistakes are expensive to undo once posts are set in concrete.
Next, decide honestly whether you're building from scratch or having a factory-built structure delivered and assembled. True DIY means a full tool kit: post-hole digger or auger, level, circular saw, impact driver, exterior screws, joist hangers, and pressure-treated lumber rated for ground contact. A delivered kit flips that equation entirely, since most of the framing decisions are already made for you. If you're still gathering ideas, browsing layout and design inspiration before you buy anything saves a lot of second-guessing later.
Before you dig or bolt anything down, check for buried utility lines, call 811, and review your local permit rules. Many towns require permits for structures over a certain size. HOAs often have their own material or height restrictions too.
Setting a Budget You Can Stick To
A realistic budget covers more than lumber. Factor in fasteners, roofing material, seating, lighting, a mini-fridge or cooler, and finishing touches like paint or stain. It's easy to price the frame and forget the extras, then blow past your number by 30 percent. Building a rough spreadsheet early keeps surprises to a minimum. It also forces you to prioritize what actually matters for how you'll use the space.
Think about how the bar will actually get used, too. If weekend football is the whole point, planning a setup built around game-day entertaining might shift your budget toward a TV mount and better lighting instead of extra shelving. Small decisions like that add up.
If a custom build sits outside your comfort zone, financing options are worth a look before you scale back your plans. Plenty of homeowners find that spreading the cost out makes a nicer, sturdier structure realistic instead of settling for a flimsy kit. Compare monthly payments against a few DIY quotes first. Sometimes the "cheaper" route costs more once your time and mistakes get factored in.
Step 1: Choose the Right Style for Your Space and Lifestyle
Matching Bar Style to Yard Size
Before you fall in love with a photo online, take a hard look at your actual patio. Size and layout should drive the decision, not the other way around. A gorgeous L-shaped bar means nothing if it eats half your only sitting area. Someone in a patio bar build thread put it well: measure twice, build once, and be honest about how much space you're willing to give up.
Once you know your footprint, match the style to how you actually entertain. Function matters more than looks here, though the good news is you rarely have to sacrifice one for the other:
- Standup bars work best on small patios where guests mingle, refill drinks, and keep moving rather than settle into fixed seats.
- High sit-down bars keep sightlines open toward the TV or grill, which makes them the go-to pick for game day crowds.
- Low sit-down and split-level bars give families a relaxed, traditional feel, closer to a kitchen counter than a nightclub rail.
- Corner bars and single-sided bars make smart use of tight or oddly angled patios where a full four-sided layout just won't fit.
- Covered bars and shed/bar combos add year-round weather protection, extending your season well past the last warm weekend in October.
Weather deserves real thought here, not an afterthought. Wind, rain, and sun exposure vary a lot by region. A style that thrives in Arizona might struggle in coastal New Jersey. If your patio catches heavy sun or driving rain, pairing your bar with sliding glass doors or a windbreak matters, and reading up on choosing the right patio door blinds can help you think through adjacent weatherproofing decisions before you commit to a final layout.
Step 2: Compare Bar Sizes and Configurations Side-by-Side
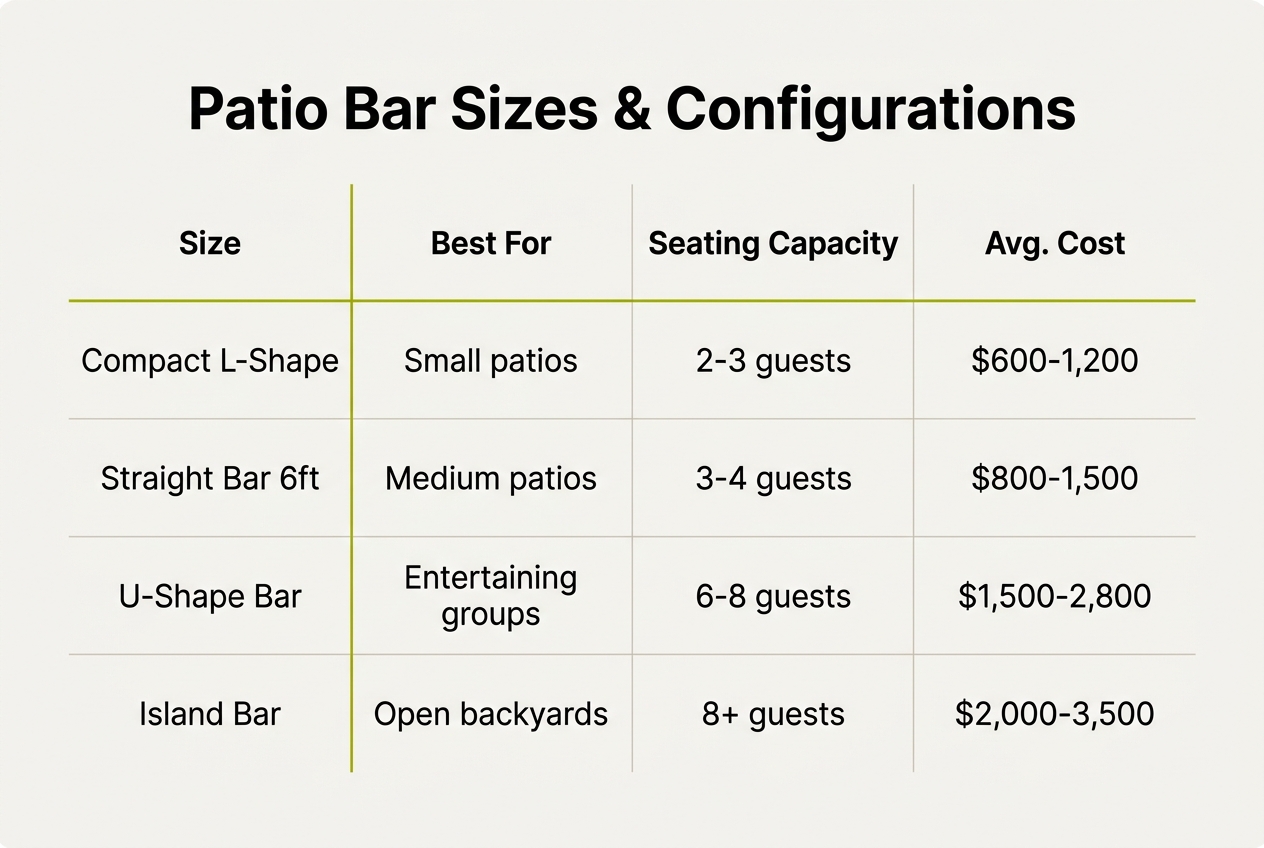
Size decides everything else about your build, so it's worth lining up the options before you fall in love with a look. A small build like a Temple Bar suits couples or a tight patio where space is at a premium. Step up to a medium or large size, like a Castlebar or Dunbar, and you've got room for the growing guest list a first house tends to attract once the word gets out. Go x-large with something like the 7-Up if game day at your place is basically a standing weekly event.
Original vs Deluxe: What's the Structural Difference
The Original line uses standard framing, fine for most yards. The Deluxe line swaps in 6x6 posts and 6-inch roof framing, which matters a lot if your patio sits exposed to open wind or coastal gusts. Think of it the way you'd compare a standard deck railing to a reinforced one: both hold up, but only one is built for the worst weather day of the year. Signature Collection styles, including the Dartford, Half Pint, Open Bar, Swingford, and Forest Hill, break from the standard footprint entirely, offering layouts suited to narrow side yards, poolside setups, or bars built for serious backyard tiki bar ideas. The table below breaks down the basics.
| Model | Size Class | Best For | Post Size |
|---|---|---|---|
| Temple Bar | Small | Couples, tight patios | Standard |
| Castlebar | Medium | Growing gatherings | Standard |
| Dunbar | Large | Regular entertaining | Standard |
| 7-Up | X-Large | Frequent large-group hosting | Standard |
| Dunbar Deluxe | Large | Exposed, high-wind yards | 6x6 |
Bigger isn't always better. A 7-Up on a small patio just eats your walking room, and that's a verdict, not an opinion.
Step 3: Pick Materials That Hold Up Outdoors
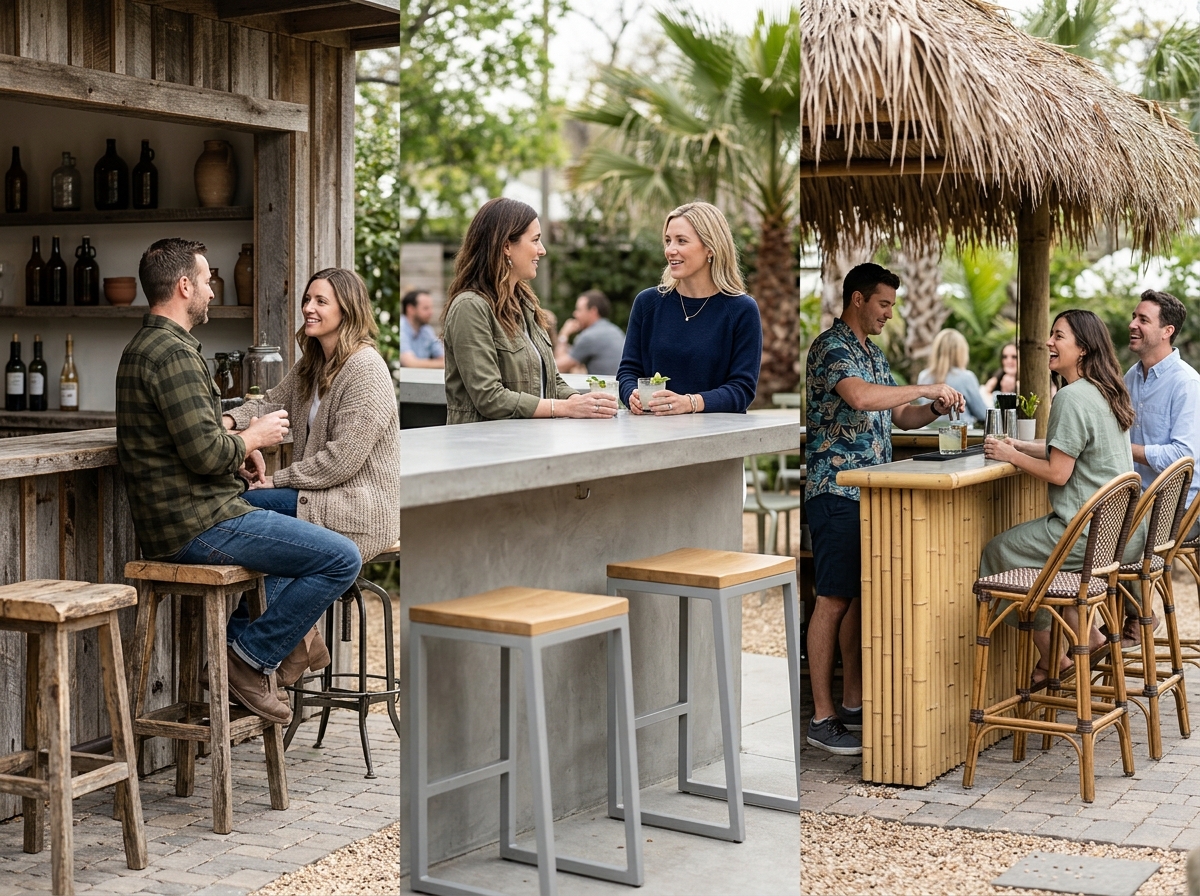
Comparing Wood, Steel, and Countertop Options
Materials make or break a backyard build. Get this step wrong and you're repainting, resealing, or replacing boards within a year or two. Get it right, and your bar shrugs off summer storms and winter freezes without much fuss.
Pressure treated lumber is the baseline for anything staying outside year-round. It's chemically treated to resist rot, insects, and moisture in a way standard framing lumber simply can't match. Pair that with galvanized corrugated steel roofing and you get a roof that sheds rain and snow without demanding constant upkeep — no shingles to replace, no tar paper to patch. If you want to see how hobbyists tackle similar builds with off-the-shelf materials, it's worth watching a step-by-step video walkthrough covering framing and roofing choices from start to finish.
Countertops are where most people underthink it. The surface takes the most abuse — drinks, sun, ice buckets, the occasional dropped grill tool. Pick based on how you'll actually use the bar, not just looks.
| Material | Durability | Heat Resistance | Cleaning Ease |
|---|---|---|---|
| Sealed Wood | Moderate, needs resealing | Fair | Easy, wipe-down |
| Concrete | Very high | Excellent | Moderate, porous unless sealed |
| Tile | High, grout can crack | Excellent | Moderate, grout needs scrubbing |
| Laminate | Low outdoors | Poor | Easy |
Notice tile and concrete top the heat category. That's good news for anyone setting a hot pan or a grill basket down mid-party. Once materials are settled, painting packages or straightforward self-paint guidance let you dial in a color and finish that actually matches your patio, not just whatever the lumber yard had in stock.
Step 4: Plan for Weatherproofing and Site Stability
Anchoring for High-Wind Areas
If your bar sits out in the open with no fence or house wall to block gusts, don't skip anchoring. Expansion bolts driven into a concrete pad or footing keep the frame from shifting or racking during a storm. It's a simple step. But it's the difference between a bar that rides out a windy night and one that ends up on its side in the yard.
Before you even think about bolts, get the ground right. Grade and level the patio surface first, since an uneven base puts stress on the joints and makes anchoring far less effective. A few hours with a level and some paver base material now saves you a wobbly, wind-vulnerable structure later.
Cold climates bring their own headache. Winterize panels close off open sides and protect the wood and steel roofing from snow load and freeze-thaw damage. Pair that with smart runoff planning, since standing water at the base rots posts fast. You want any grading to channel water away from the footings rather than toward them. If you're picturing something closer to a lounge than a shed, browsing modern outdoor bar ideas can help you see how covered or partially walled designs handle rain and snow without sacrificing style. In regions with heavy weather, a partially enclosed layout just makes more sense than a fully open one. No point fighting the climate every season.
Step 5: Assemble or Install Your Patio Bar
DIY Build Timeline vs Professional Assembly
Here's the honest split. A factory-built kit shows up on a truck, and a crew puts it together on-site in about 90 minutes. That's not a typo. Panels, posts, and roofing arrive pre-cut and pre-fitted, so the crew is basically assembling a large puzzle rather than building from raw lumber. If your weekend is precious, this matters a lot.
Going fully DIY is a different animal entirely. You're framing the structure, installing roofing, cutting and fitting a countertop, and probably making a couple of hardware store runs you didn't plan on. Expect a full weekend at minimum, often longer once you factor in curing time for post anchors or paint. Anyone who's tackled a similar backyard build knows the guide behind an outdoor bar with a built-in cooler gives a good sense of what a scratch-built project actually demands in tools, time, and patience.
Both paths get you to the same happy hour. But if you've got a specific weekend in mind — a graduation party, a playoff game — the math usually favors the pre-built route. DIY rewards patience; kits reward deadlines.
Accommodating Space Constraints and Traffic Flow
Low patio ceilings, pergola overhangs, or a mounted TV that's bigger than the original design intended — these are common snags. Adjustable roof height and reworked shelving let the structure fit the space instead of forcing the space to fit the structure. If you're mounting a 65-inch screen for game day, confirm the header clearance before installation day, not after.
Narrow patios create their own headache: foot traffic. A customizable entry side solves a lot of that friction by letting you choose which direction guests walk in from, rather than defaulting to a fixed layout. Think about how people will actually move between the grill, the seating, and the bar itself. A poorly placed entry turns a nice bar into a bottleneck. That's a real problem, and it's an easy one to avoid if you plan for it upfront.
Confirming Delivery and On-Site Logistics
If you're ordering from a nationwide provider, ask exactly how delivery works before you commit. Some builders assemble on arrival as part of the package; others simply drop materials at the curb and leave you to it. That distinction changes your entire weekend, so get it in writing.
Confirm truck access to your yard, gate widths, and whether a permit or HOA notice is needed in your area. Small details, big consequences. Ask about weather contingency plans too, since a rained-out install date should have a clear rescheduling policy rather than a vague promise.
Step 6: Furnish and Accessorize Your New Outdoor Bar
Must-Have Accessories for Entertaining
The structure is up. Now comes the fun part. Furnishing your bar right is what turns a nice backyard feature into the place everyone actually wants to hang out. Start with seating: stools should match the counter height, usually 42 inches for a standard bar, with a few extra inches of legroom so guests aren't hunched over their drinks.
Lighting and shelving matter just as much as the bar itself. Warm string lights set the mood, while a couple of open shelves keep glassware and bottles within reach instead of buried in a cooler. If you want inspiration for layout and DIY flourishes, it helps to watch a real build in action, and one popular backyard bar build video walks through smart, budget-friendly finishing touches.
- Stock the bar top with bottle openers, coasters, and a bar mat so drinks don't leave rings on the wood.
- Add a glass rack or hanging stemware holder to free up counter space during busy game days.
- Build in or install a grilling station beside the bar so cooking and serving happen in one spot, not two.
- Consider a shed/bar combo if you need somewhere to stash cushions, cornhole boards, and pool floats.
- Paint the trim in your favorite team's colors for instant game-day energy.
- Swap in seasonal string lights or lanterns to keep the space feeling fresh year-round.
None of this is complicated. It's just the layer that makes people want to stay past one drink.
Wrap-Up: Enjoying and Maintaining Your Finished Patio Bar
You've gone from measuring your patio to pouring the first round, and that's no small thing. Layout decisions, size comparisons, weatherproofing, assembly, and finally the fun part — stools, string lights, a mini fridge — all add up to a space that actually gets used. If you're still tinkering with the build itself, browsing plans built around a concrete counter and cedar base can spark ideas for finishing touches or a future upgrade. But the work doesn't stop once the party's over. Regular upkeep is what separates a bar that looks sharp in year five from one that's sagging and gray.
Set a twice-yearly reminder, spring and fall, to check the wood for cracking, inspect roofing panels for rust or loose fasteners, and confirm anchoring points haven't shifted. It's a 20-minute job that saves you a much bigger one later. Plan to reapply paint or sealant every two to three years, sooner in coastal areas or harsh sun, to keep moisture out and color true. Skip this and you're not saving time. You're just borrowing trouble.
Some fixes are simple weekend tasks. Others, like structural repairs, roof replacement, or adding electrical for lighting and TVs, call for a professional. When comparing builders for repairs or new additions, ask about refund guarantees or workmanship warranties. That coverage tells you a lot about how much a company stands behind its own work.
Before you settle on a direction, it's worth being honest about what you actually want from the space: a place to gather and serve, or a full cooking setup with running water, gas lines, and built-in appliances. The second path means permits, a licensed plumber and electrician, and a contractor who handles hardscaping and utilities — real costs that are easy to underestimate when you're picturing the finished result. If the gathering part is what you're really after, a freestanding covered bar paired with a good grill can carry most of the entertaining load, with cooking hardware and any utility work handled separately by the trades who specialize in it.